Category Archives: Tips for computer

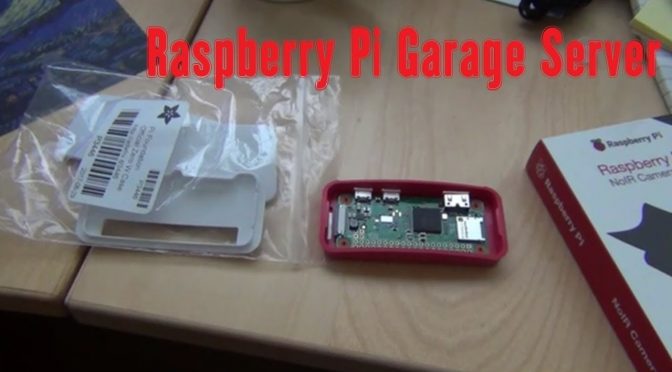
Raspberry Pi Garage Server – an IoT Project


This is my newfound interest – IoT or Internet of Things. I have been taking in all the Maker movements and decided to do something about it. This particular project Raspberry Pi Zero W was the first of the many IoT projects I plan to do and bring you along in my journey. Raspberry Pi Zero W is one of my favorite controller because it’s compact, inexpensive ($10) and with built-in Wifi and well supported by the Raspberry Pi community.

I wouldn’t say this was challenging to me as I have done more difficult and complex hardware design in my career as a hardware development engineer, designing the big-iron mainframe computer and multi-CPU servers. But this was probably more fun as I got to sense and control the real-life environment and it’s relative inexpensive to do.

I look forward to sharing more of this type of projects with you, in addition to all the “boring” book reviews, according to my daughter, I will continue to make.

Maximize Refresh Rate for 4K Monitor – A LearnByBlogging Quick Tip

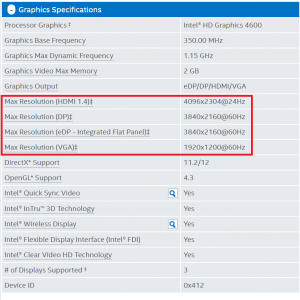
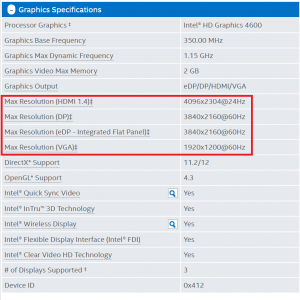
I recently bought a 4K monitor (LG – 27″ IPS LED 4K UHD FreeSync Monitor model 27UD68) with 4x the HD (1K High Definition 1920×1080) resolution or 3840×2160 resolution. Upon its arrival, I was so excited to set it up and hook it up to my computer, which I already checked before ordering that its embedded graphic controller can support 3840×2160 resolution based on the Intel CPU Description by searching for the CPU’s “ark.” For example, my computer has an Intel i5-4590 CPU. I googled and saw my CPU can support 3840×2160 resolution based on Intel’s ARK here, it should support 3840×2160 without any problem.

After plugging the DisplayPort to HDMI cable that connected the DisplayPort to the computer and HDMI port to the monitor, I saw the wonderful 4K display. Everything looked smaller but with a high resolution, just like Apple’s Retina Display. The only problem was that my computer appeared to be not very responsive to my mouse and scrolling actions. It’s very annoying. I almost wanted to switch back to my original HD 1K monitor.

Then I looked closely at the graphic display, I saw that the display was only running 29 Hz refresh rate. I tried to force the refresh rate 60 Hz but it wouldn’t let me, complaining that it exceeded the maximum bandwidth for the port. After examining the spec closely, the HDMI port supports only HDMI 1.4, which according to Wiki page, can support up to 30 Hz at 3840×2160. In other words, the refresh rate limitation is on the HDMI protocol, not the CPU nor the system. Then I checked again and saw the DisplayPort can support up to 3840×2160 @60Hz. I immediately changed the cable from DisplayPort to DisplayPort. The computer immediately register 59 Hz automatically. Wow! It made a huge difference on how I perceived the responsiveness of the display. It’s like day and night.

My key takeaways:
1. The display refresh rate has a lot to do with how you perceive the responsiveness of your computer.
2. Always check if your computer or laptop can support the display mode your new monitor is capable of running. Check with the CPU spec by googling the specific CPU model name.
3. Don’t count on the HDMI port to support 4K monitor at 60 Hz unless it’s capable of HDMI 2.0. Use DisplayPort to get the maximum resolution at a high refresh rate.

Monitor Display Cropped With HDMI Input From PC – How I Fixed It

Recently, I replaced my 24″ monitor that has a VGA and DVI inputs with another monitor ViewSonic VX2453 that has one VGA input and 2 HDMI inputs. All is well when I connect to the VGA input from my desktop PC. But I need to share this monitor with both my PC and my laptop, which has only one HDMI output. So I just need to connect the HDMI output to the HDMI input of the monitor. Simple right? Not so fast. The display turned out to be heavily cropped by the monitor, in other words only ~70% of display was shown; the rest could not be seen.

I suspected there may be three possible causes: 1) my graphic display driver and 2) HDMI cable 3) the monitor settings.

The first thing I did was to update the Intel HD 3000 graphic driver, which was dated 2011. I downloaded the Intel Driver Update Utility 2.2 . The utility failed to update the driver after 3 attempts. Then I tried to download the driver directly from the vendor’s (Acer) update site, which hosted the same old driver I had. Then I Googled and found the exact driver from Intel’s manual download (go to download center and search on “hd 3000”). The worked fine to update to the latest graphic driver: dated 5/16/15. Great! But it did NOT help my monitor cropping problem.

Next I tried to rule out the HDMI cable by swapping the cable with another. It didn’t help either.

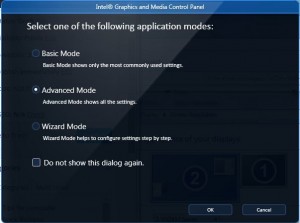
Then I Googled around and saw another idea from this article. The suggestion to change the scale seemed to make sense. The first step is to select the Advanced Graphic Mode by right clicking the background wallpaper and select “Graphic Properties”. See below:
Graphic mode
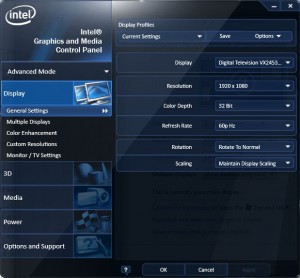
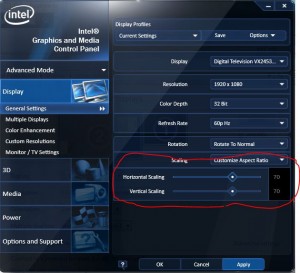
So I change from “Maintain Display Scaling” to “Custom Display Scaling” and adjust to ~ 70% to get out of the “cropped” mode. See below:
BEFORE:
Scale Original
AFTER
Scale After

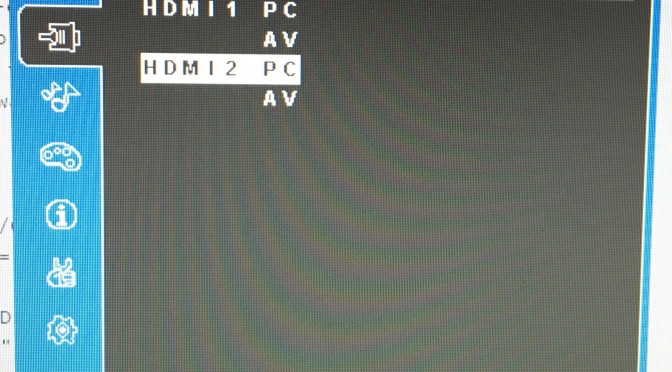
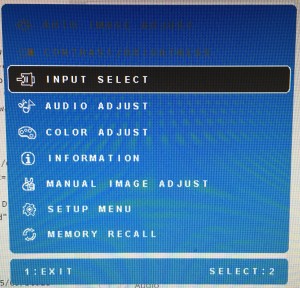
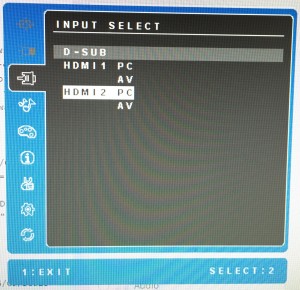
So this should fix it right? Yes and no. The display was not cropped but it looked like “crap” – lots of rough edges. This was not going to work for me. So I decided to try my last option 3 – adjust the monitor. I went through each menu carefully. And voila! I found the source of the problem. As it turned out, this monitor has two different modes for the HDMI input: AV mode and PC mode.
2015-09-29 22.12.45
2015-09-29 22.13.01
The default is the AV mode which automatically crop out 30% of the display. By selecting the PC mode. The problem went away after changing the Scale to “Maintain Display Scaling” and the display was fantastic! Problem fixed!

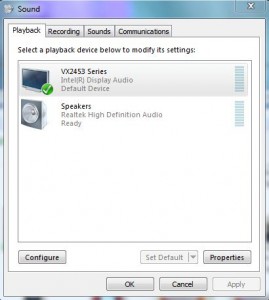
By running the display via the HDMI cable, the sound can be redirected to the speaker of the monitor. But I had to manually changing the sound output to the VX2453 by right clicking the speaker icon on the bottom and select “Playback devices” and then select “VX2453 Series” to be the default output.
Sound Output Selection
That was the bonus! Hope you find this tip helpful and wouldn’t have to waste the 2 hours I spent to fix the problem.

Adobe Digital Edition Woe – “Error! Check Activation” – How I Fixed It

For some reasons, one of my Windows 7 PC’s complained about “Error! Check Activation” when I tried to download an ePub eBook from Overdrive, an eBook loan program from my library. On another PC, I had no problem and I didn’t have this problem on this PC before. So I decided to remove the Adobe Digital Edition’s authorization and re-authorize. Then I encountered this error “”unable to erase authorization. please try after some time” I kept trying and trying without avail.

After googling/checking around and based on this Adobe Forum thread, I was able to fix the authorization removal problem by editing the Windows register directly:

run regedit
1. Quit Adobe Digital Edition.
2. Choose Start > Search for regedit (On Windows 10: it’s in c:\Windows directory)
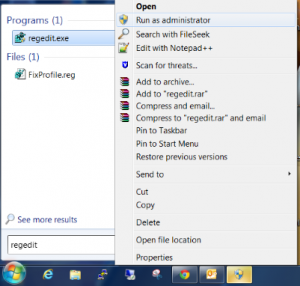
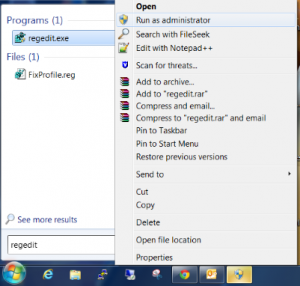
3. Right click on regedit, ans select “Run as admininstrator”
4.In the left pane of the Registry Editor, locate the following registry key: HKEY_CURRENT_USER\Software\Adobe\Adept
5. Select “Adept” , right click on it and select “Delete”
6. In the Confirm Key Delete dialog, click OK.
7. Close the Registry Editor.
8. Open Adobe Digital Editions and reauthorize (Help->Authorize Computer…).

And Voila! It worked. I can download the eBook again.
Another tip: be sure to de-authorizethe PC when you decided to retire it.

How I Upgraded My Laptop Harddisk to SSD


The best ways to boost your computer performance without changing the CPU are two folds: 1. Increase your DRAM or DIMM/memory capacity, which serves as a local scratch pads for your operating system and applications. 2. Increase your harddisk speed by changing to SSD (Solid-State Drive or Flash Drive). In this video, I showed you how I upgraded a cheap laptop (~$250) to an Ultrabook by replacing the slow harddisk to an SSD. This laptop already has 4GB of memory and is plenty enough. All it needs is a fast SSD to turn into a reasonably fast computer with a long battery life (> 6 hrs).

Say Hello and Goodbye to My Acer Chromebook – Why I’m Ditching It

Lately, I’ve been hearing so much about Chromebooks, I even played with it at Best Buy (thanks to their “Showrooming” ;-). When their prices dropped below $200 for a brand new Acer C720, I decided to get one to play with it. I read all about its limitations and the potentials for the expanded capability after installing Ubuntu through Chroot (Crouton) and dual-boot (ChrUbuntu) methods. I have used Enterprise Linux version at work and would like to try the “client” Linux like Ubuntu for the fun of it. Because I knew I wanted to play with Ubuntu Linux so I decided to buy a used 32GB (vs. standard 16GB) flash storage version from eBay for $169. By the way, 32GB is needed if you want to run ChrUbuntu since a full Ubuntu by itself would probably need 24GB on its own if you plan to keep the Chrome OS as a dual-boot.

Since I received the Chromebook on 6/27/14, I have spent numerous hours playing and hacking it. My impression of Chrome OS is that it’s really for the consumers of digital contents due to its limitations. Here are the pluses and minuses:
Pluses:
1) Fast boot and wake up from sleep (almost instantaneous like a tablet).
2) Excellent browsing experience. The two-finger scrolling and three-finger flipping through the browser tabs are nice. Of course, having a physical keyboard makes a big difference as compared to browsing on an iPad. And the trackpad on Acer C720 works really well with sufficient immunity from accidental palm touchings.
3) Most apps are responsive and fast, thanks to the Intel Haswell Celeron 2955U 1.4 GHz CPU, 2GB DRAM’s and 32GB flash drive.
4) Seamless integration with Chromecast. (More on Chromecast on a later blog).

Minuses:
1) No email clients like Thunderbird except webmails like gmail, which works very well but not good enough for work-related emails.
2) No use of OpenOffices.
3) No IPsec VPN (the one my employer uses)
4) Can’t run Java apps. Java plugins cannot be installed. I sensed some bad blood between Google and Oracle such that Google refused to put Java on Chromebook at the time of this writing.

If you don’t plan to do lots of emails and are mainly browsing the web and run only Chrome Apps, then Chromebook may be the right laptop for you as a supplement to your tablets. Since the #1 and #3 minuses are show stoppers for me, I need to add on Linux to mitigate them. There are two options: Chroot and ChrUbuntu.

I first installed Chroot to enable running Ubuntu along side the Chrome OS in “Developer” mode. This was ideal as I would have the best of the both worlds: Chrome OS and Ubuntu – switching back and forth with simple CTL-ALT strokes. The only problem was that I couldn’t install VPN properly on it – neither Cisco AnyConnect nor OpenConnect. I suspect that the Chrome OS, running in parallel, may be causing conflicts. I gave up on it after 3 days of intensive hacking.

Then I decided that install Ubuntu as a duel-boot partition. I followed the installation directions here. After a couple of hours of downloading and installation, I was able to boot to Ubuntu and installed Cisco AnyConnect VPN. I was now in business.

Then after playing with the Ubuntu on Chromebook, I discovered a few quirks that really got me to wonder why I bothered with Ubuntu.
1. Some system settings don’t work right, like disabling the mouse while typing to avoid cursor movement. I had to type in a command to enable it manually (“/usr/bin/syndaemon -i 1.5 -K d”) and I had a hard time putting in the autostart service.
2. Locale issue: Constant “Locale” warnings popped up when running a shell. I fixed it with this locale tip.
3. Font sizes: I had a hard time fixing the font sizes on Ubuntu. It was either too small or too big.
4. The touchpad no longer works after I accidentally disabled it and wasn’t able to bring back the driver. Sigh! (This was fixed by following the directions in this link).

So at the end, I started to miss and appreciate Microsoft’s Windows 7 or even Windows 8. With Ubuntu on Chromebook, I would be wasting lots of my time fixing some minor Linux issues which seem to pop up here and there, unless I revert it back to the standard Chrome OS Chromebook, which would not do better than an iPad or an Android tablet. Then I looked around and found that for an extra $20~30, I could have bought a cheap full Windows laptop instead!

My conclusion is that, at this time, Chrome OS Chromebook and Ubuntu Chromebook are not ready for prime time. I like the pluses but the minuses are too great for me to ignore. I will most likely be reselling my Chromebook on eBay…

Installing Thunderbird on Oracle Linux or Redhat Linux

Geek alert! If you don’t do system administration on a server, this is probably not very interesting to you. But if you’re curious about installing the Thunderbird email client on a Linux Server and how it’s different from your regular click-and-install on a Windows or Mac PC, then you may want to read on.

Oracle Linux is a freely downloaded operating system that anyone could download to your server or PC and enjoy an instant power over a very powerful server, commonly used to facilitate data processing on the Internet. You use them when you shop on Amazon, search on Google or use Google Drive and etc. So what’s a big deal in installing Thunderbird on a server?

Well, installing software on a Linux system is NOT straightforward. This is why Microsoft Windows remains the gorilla in the PC world, albeit a declining one. For several times over the span of months, I attempted to download Thunderbird directly from http://www.mozilla.org/en-US/thunderbird/ and install it on the Oracle Linux server that I manage, I kept running into all kinds of problem. Like after installation, Thunderbird would not run, complaining of “libxul.so: cannot open shared object file: No such file or directory Couldn’t load XPCOM.” And then the software would just die. I tried on several machines and kept running into the same problem. Many people are having the exact problem based on my Google search.

After googling around and looking for a solution for over a month, I discovered that the standard Thunderbird download site contains a simple Linux version of the Thunderbird, destined for mostly client-based Linux like Fedora, or others. (Yes, there are many Linux variants: those for the PC/Clients and those for the servers.) But it would not work properly in the “Enterprise”-class type of this Linux variant – Oracle Linux.

1. You’d need to do a software update. This is done with the “yum install” command to bring all the software modules up to date. This Oracle Public Yum site helped me.

2. Next, download the latest Thunderbird from this website
using your favorite browser.

3. Find the rpm module from this findrpm website instead of from Thunder Download. Keep in mind that you’d need to look for CentOS version as it’s mostly compatible with Oracle Linux. See below screenshot:
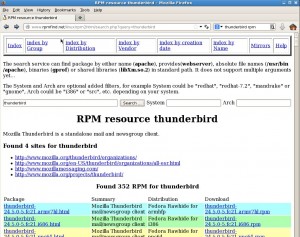
findrpm

4. Download the correct version:
centos_rpm
Look for your corresponding OS version. I had a Oracle Linux 5.10 so I looked for “x86_64” version of CentOS 5.10 if you have a 64-bit version, otherwise look for the “i386” version.

5. Install with “rpm -i Thunderbird-xxxxx.rpm”. You can try to run it but for the Oracle Linux 5 version, there is another rpm, Launchmail, to install before it’s fully functional.

6. Download and install “Launchmail”:
centos_rpm

There you have it. You can now run the Thunderbird from /usr/bin/thunderbird .

Unlike the PC or Mac OS version, Thunderbird for Enterprise-class Linux is a pain to install. No wonder people are stuck with Microsoft and MacOS because of the ease of installation and other numerous ease-of-use reasons. Hopefully, this tip helps. I surely hoped someone else had written this before I spent many hours getting Thunderbird to work. However, I got to understand how fragmented Linux Apps are. There were many details I wish I didn’t have to deal with. Just double click and install automatically. Until that happens, Linux is not going to catch on for most people.